Ampxchange.com
Uninstall Ampxchange.com from Windows 10
Ampxchange.com errors which should also be noticed 0x80248FFF WU_E_DS_UNEXPECTED A data store error not covered by another WU_E_DS_* code. , 0x8024002B WU_E_LEGACYSERVER An operation did not complete because it requires a newer version of server., 0x8024A003 WU_E_AU_LEGACYCLIENTDISABLED The old version of the Automatic Updates client was disabled., 0x80245001 WU_E_REDIRECTOR_LOAD_XML The redirector XML document could not be loaded into the DOM class., Error 0x80246007, 0x0000007B, 0x80248006 WU_E_DS_BADVERSION The current and expected versions of the data store do not match., 0x80240036 WU_E_INVALID_OPERATION The object's current state did not allow the operation., 0x0000000D, 0x80249003 WU_E_INVENTORY_RESULT_UPLOAD_FAILED Failed to upload inventory result to the server., 0x8024801D WU_E_DS_IMPERSONATED A data store operation did not complete because it was requested with an impersonated identity., 0x80240033 WU_E_EULA_UNAVAILABLE License terms could not be downloaded., 0x80240009 WU_E_OPERATIONINPROGRESS Another conflicting operation was in progress. Some operations such as installation cannot be performed twice simultaneously.Easy Steps To Get Rid Of Ampxchange.com From Infected OS
Ampxchange.com is detected as a perilous OS threat which can harm your OS data and files very badly. It intrudes your OS silently and secretly so that you will not identify its presence easily and it can spread itself as much as possible. It can corrupt your data and make it inaccessible. Moreover, it can cause your OS to degrade its performance and applications to respond slowly.
You can infect your OS in many ways like when you open a spam email, visit some unknown and untrusted site, clicking malicious ads or pop-ups and many other ways. But one important method used by Ampxchange.com is bundling method in which it gets installed directly with the installation of free downloads. On its arrival into the system, it can almost disturbs the internal settings and functioning of the OS. Hence, if you find such malware into the OS, you need to Get Rid Of it.

Guide 1 : Delete Ampxchange.com From Internet Explorer In OS
Guide 2 : Delete Ampxchange.com From Control Panel In OS
Guide 3 : Delete Ampxchange.com From Registry Entry In OS
Guide 4 : Delete Ampxchange.com From Task Manager In OS
Guide 5 : Guides To Start OS In Safe Mode
Tips To Effectively Get Rid Of Ampxchange.com From Your OS
Guide 1 : Delete Ampxchange.com From Internet Explorer In OS
From Internet Explorer -
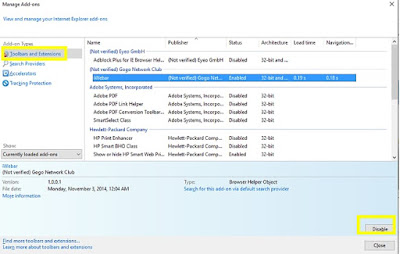
- Click on Gear icon to open Tools menu in the Internet Explorer window.
- Click on Manage Add-ons option.
- Goto Toolbars and Extensions tab.
- Locate Ampxchange.com related add-ons - > Disable button.
- Click More information button and finally click on Get Rid Of button to completely Get Rid Of Ampxchange.com.
From Google Chrome -
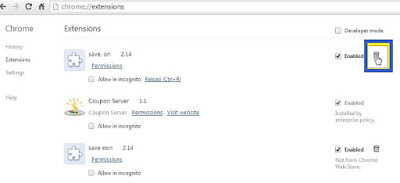
- At first, launch the Google Chrome browser.
- Click on gear icon present in your browser to open Chrome menu.
- Click on Tools option.
- Click on Extension.
- Select all unwanted extensions.
- Click on trash bin icon to Get Rid Of Ampxchange.com.
From Mozilla Firefox -
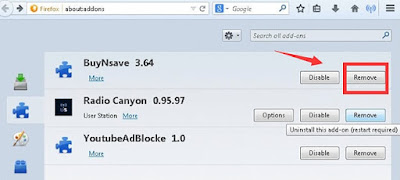
- Click on the Menu icon present at the top right corner of the browser.
- Select Add-ons option.
- In the Add-ons window, choose the Extensions or Appearance panel.
- Select add-on related to Ampxchange.com which you want to Get Rid Of.
- Click the Remove button.
- Click Restart if it asks.
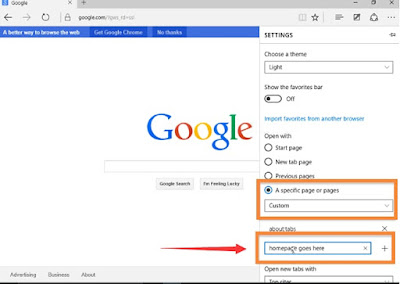
From Microsoft Edge -
- Click on More (...) icon and click Settings then.
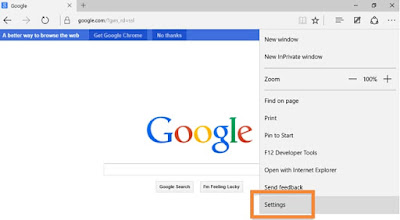
- Now, select A specific page or pages under the Open with option.
- Again, select Custom option.
- Type the URL of the page you want to set as your browser's default homepage.
Guide 2 : Delete Ampxchange.com From Control Panel In OS
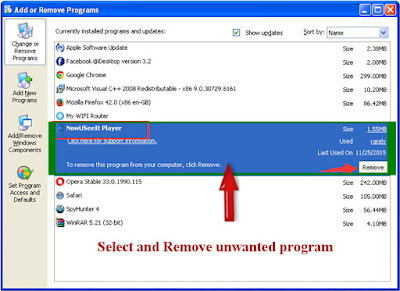
For Windows XP
- Click on Start button and click Control Panel.
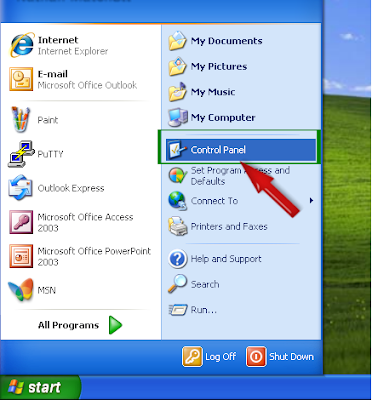
- Select Add or Remove Programs option.
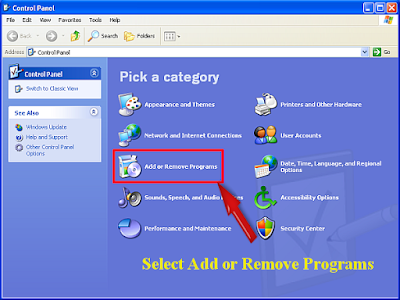
- Find and Get Rid Of Ampxchange.com related programs in the window that appears.
For Windows 7
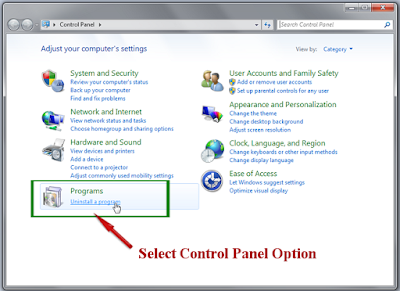
- Press Window key present on the keyboard.
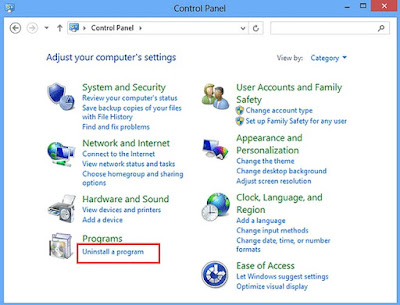
- Click Control Panel option from the menu.

- A Control Panel window appears from where click on Programs option.
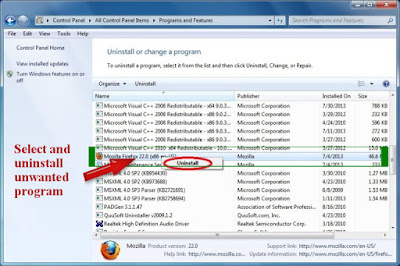
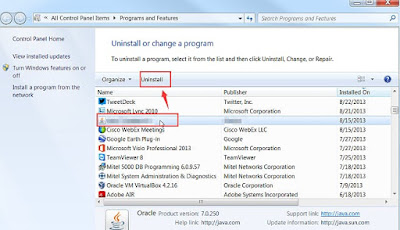
- Select executable file of Ampxchange.com.
- Click on Uninstall option.
For Windows 8
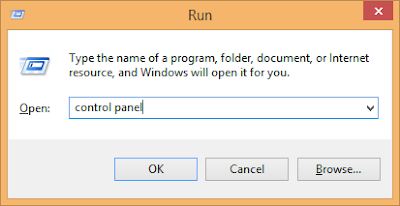
- Open run box by pressing Window+R keys together.

- Type control panel and hit Enter key.
- Click on Get Rid Of a Program.
- Then select all the programs related to Ampxchange.com.
- Click Uninstall option.
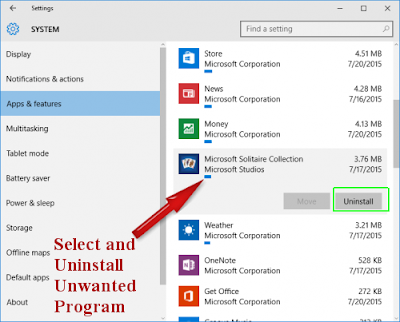
For Windows 10
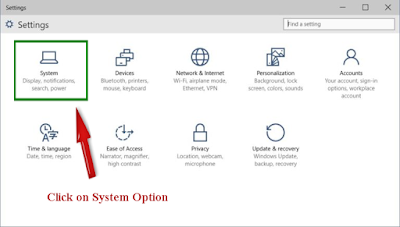
- Click on Start button.
- Select Settings option present in the bottom left corner of the screen.

- Select System option under Setting.
- Click on App & Features option.
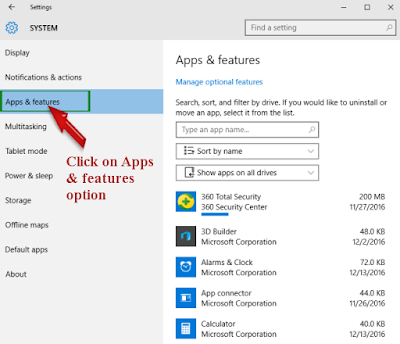
- Now, Get Rid Of all the unwanted program.
Guide 3 : Delete Ampxchange.com From Registry Entry In OS
- Press 'Windows+R' keys to open Run box.
- Type 'regedit' in the box and click OK button.
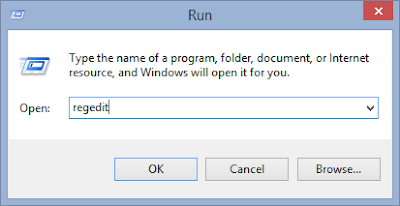
- Find out Get Rid Of all the registry files related to Ampxchange.com.
HKEY_LOCAL_MACHINEOSCurrentControlSetServicesWpm
HKEY_CURRENT_USERSoftwareMicrosoftInternet ExplorerMain “Default_Page_URL”
HKEY_LOCAL_Machine\Software\ClassesAmpxchange.com
HKEY_CURRENT_USER\Software\Microsoft\Windows\CurrentVersion\Run “.exe”
HKCU\Software\Microsoft\Windows\CurrentVersion\Internet Settings\random
HKEY_LOCAL_MACHINE\SOFTWARE\Microsoft\Windows\CurrentVersion\run\random
HKEY_CURRENT_USER\Software\Microsoft\Windows\CurrentVersion\Internet Settings “CertificateRevocation” = ’0
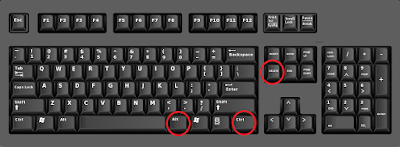
Guide 4 : Delete Ampxchange.com From Task Manager In OS
- Press Alt + Ctrl + Delete keys altogether to open task manager.
- In the window, click on Process tab.
- Select the unwanted processes running.
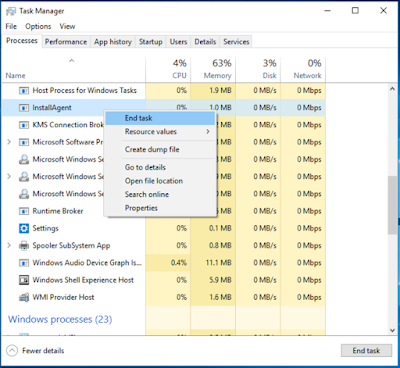
- Click on End Process.
Guide 5 : Steps To Start OS In Safe Mode
In windows XP/Vista/7 -
- Click on Start icon.
- Place the mouse on Shutdown button and then click on Restart button.
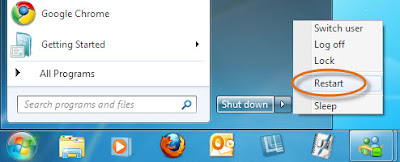
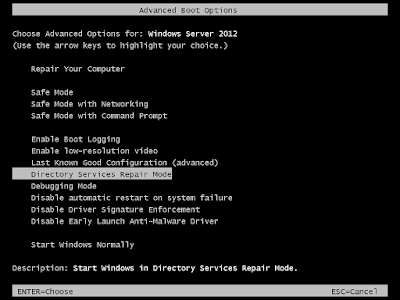
- Keep pressing F8 button when the OS starts booting-up.
- Select 'Advance boot menu' present on the screen.
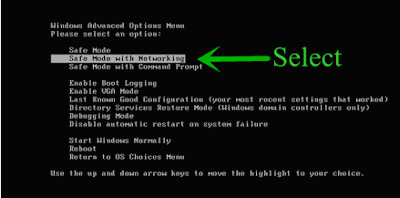
- Select 'Safe Mode With Networking' option and press Enter key.
In windows 8/10 -
- Click on Start button and press Shift key at the same time.
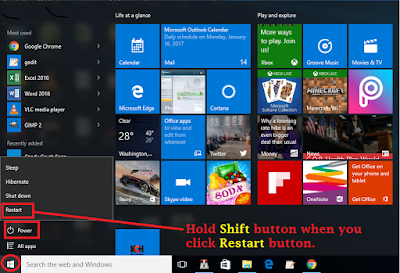
- Click on Restart button and click Troubleshoot option.
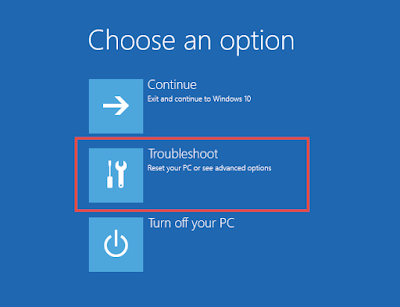
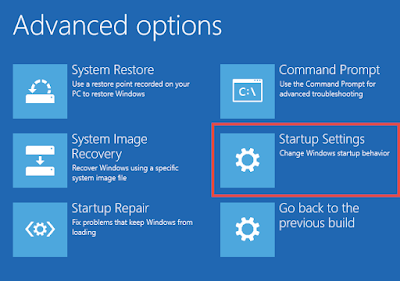
- Click on 'Advanced option' -> Startup Settings.
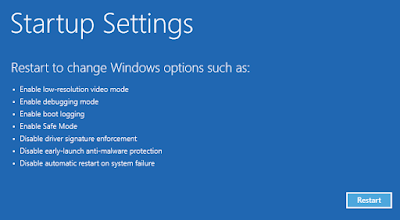
- Choose 'Enable Safe Mode' option from the given list and click on Restart.
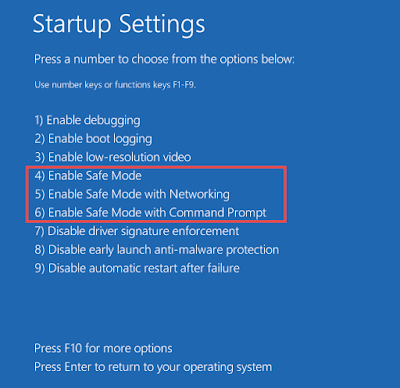
- Press F5 button to choose 'Safe Mode With Networking' mode.
No comments:
Post a Comment